
What is Laser Marking?
Laser is an acronym for Light Amplification by Stimulated Emission of Radiation. A laser generates a highly concentrated beam of light that is controlled with precision to engrave or mark on nearly any material.

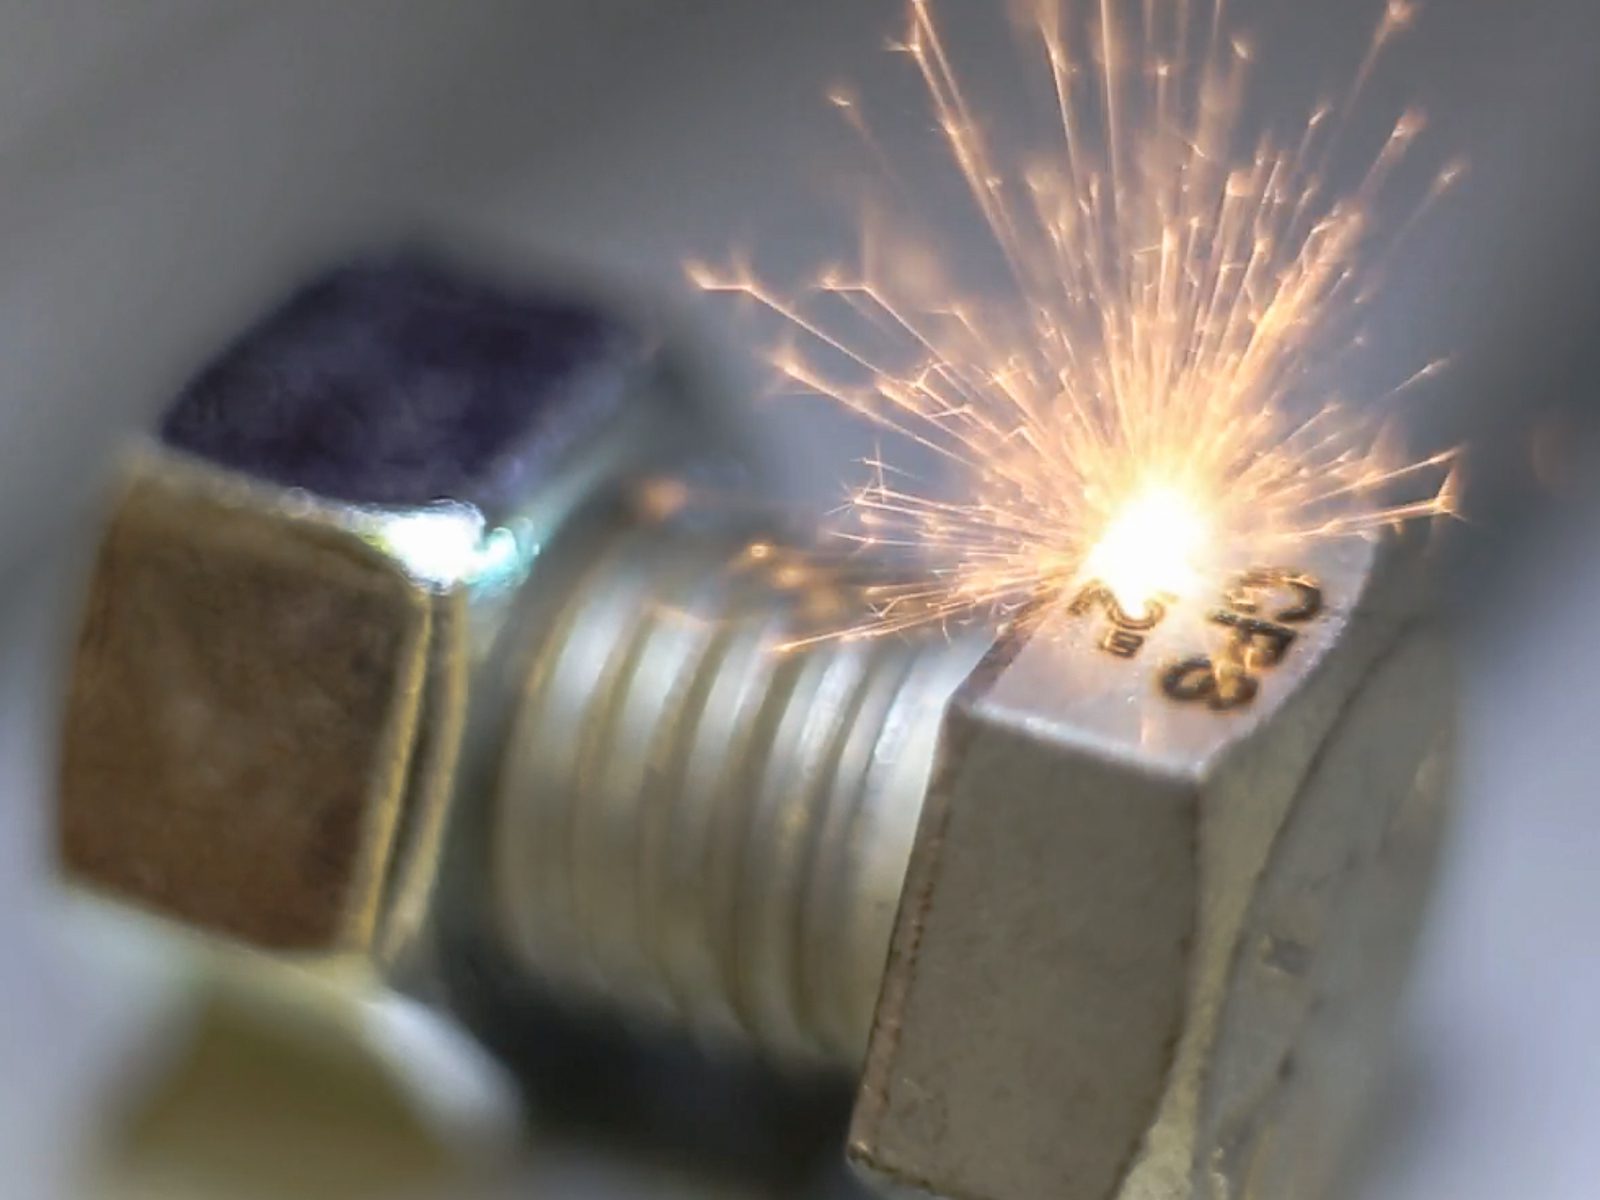
Laser marking is a thermal process that uses a focused laser beam to alter the surface of a material. Depending on the material, its surface finish, and the laser’s wavelength and wattage, the beam can create different types of marks such as engraving, annealing, or coloration. Because the laser modifies the material’s surface itself, the mark is resistant to wear, heat, and chemicals, making it ideal for industrial environments.
Laser marks are clean, precise, and permanent. Unlike printing or labeling, lasers don’t rely on inks, ribbons, chemicals, or other consumables, delivering an excellent return on investment.

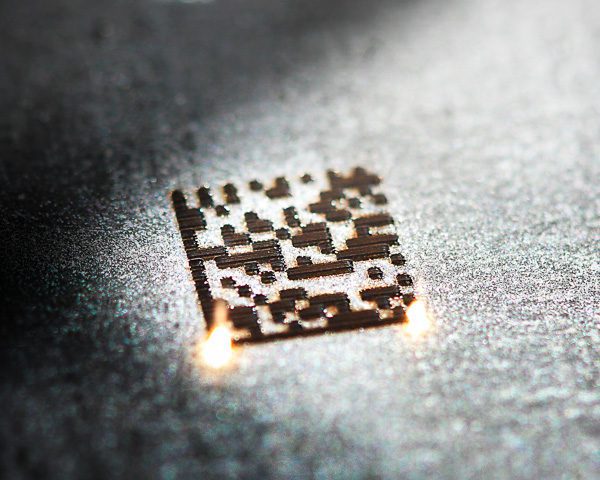
Laser marking allows manufacturers to track parts through production, ensure authenticity, and ensure lifetime identification. Sectors like automotive, aerospace, medical devices, and electronics rely on lasers to label their products with:
- Part identification including part numbers, serial numbers, bar codes, and QR codes
- Branding such as your company logo, name, and address
- Regulatory compliance information
How Laser Marking Systems Work
Laser marking systems create permanent marks by focusing highly concentrated light onto the surface of a material. The beam’s energy is absorbed and converted to heat, altering the surface through etching, engraving, annealing, or color change.
The Science Behind the Beam
Inside the laser source, a medium (such as crystal or gas) is stimulated to release photons. These photons trigger more photon emissions, amplifying the light inside a resonator cavity. Once enough energy builds up, the beam is emitted as a single high-energy stream of light. Directed through optics, the beam’s energy interacts with the material surface to create a permanent mark.
The Process
- The laser source generates a beam of light at a specific wavelength and power level
- A configuration of mirrors and lens optics steer and focus the beam to make marks
- The software controls the mark content (text, bar codes, and graphics) as well as the settings that determine the placement and depth of each field

Types of Laser Marking Systems
1. Flatbed Lasers
Flatbed lasers, also called plotter lasers, use an array of mirrors to send the laser beam straight down through a lens. To direct the beam, a collection of two mirrors (mirrors 2 and 3) and the lens on a gantry move in unison on X/Y axes like a plotter printer.
As the final mirror (mirror 3) and lens move back and forth on the X axis, the laser marks the message or image one line at a time. Some flatbed lasers are capable of marking the outlines of text and graphics in vector style by moving the lens on the X and Y axes at the same time.

Flatbed lasers are best for:
- Marking large batches of flat products at a dedicated station
- Low-volume applications where fast printing is not required
2. Galvo Lasers
Dual-galvanometer (shortened to galvo) lasers use two precision mirror galvanometers to direct the beam at any angle within the marking window of the laser. This allows the beam to mark continuous, vector-style characters very quickly. The result is smooth, high-quality marks without the pixelated look of raster-style characters.
Galvo lasers are fast enough to use on a production line as materials move past the marking head. When used in a Class 1 enclosure, individual parts or trays of parts are marked very quickly for high-volume production needs.

Galvo lasers are best for:
- High speed marking & engraving
- Marking parts of different heights
- Marking parts directly on the production line and communicating with PLCs or host systems
Choosing the Right Laser
There are several factors to consider when choosing the right laser system for your marking jobs. First, there are the characteristics of the item(s) being marked, then the mark requirements need to be understood.


Laser Wavelengths
Laser marking can be accomplished with several types of lasers. The most common types are gas lasers, solid-state lasers, and fiber lasers. Each type works in a unique way to generate a laser beam at a specific wavelength. Each wavelength is suitable for marking on specific materials because materials absorb different wavelengths of light at different rates.

Laser Wavelength/Material Compatibility Chart
| Type | Material | CO2 | YAG | Fiber, low watt | Fiber, high watt |
|---|---|---|---|---|---|
| Metal | anodized aluminum | ■ | ■ | ■ | |
| Metal | burnished metal surfaces | ■ | ■ | ■ | |
| Metal | metals and alloys | ■ | ■ | ■ | |
| Metal | metals and alloys, high temperature | ■ | |||
| Metal | painted metals | ■ | ■ | ■ | ■ |
| Plastics | plastics | ■ | ■ | ■ | ■ |
| Plastics | polycarbonate | ■ | ■ | ■ | ■ |
| Plastics | silicone | ■ | ■ | ■ | ■ |
| Plastics | transparent plastics | ■ | |||
| Organics | ceramics | ■ | ■ | ■ | ■ |
| Organics | glass | ■ | |||
| Organics | leather | ■ | ■ | ■ | |
| Organics | paper | ■ | ■ | ||
| Organics | rubber | ■ | ■ | ■ | |
| Organics | wood | ■ |
Laser Wattage and Speed
The laser’s power (wattage) is the maximum energy level that the laser can deliver to the process of marking materials. Laser wattage can range from a few watts to over 100 watts. Wattage is one of the key factors that determines a laser and laser system’s marking quality. The power level and marking speed are adjustable in the settings of the laser software for precise control over the mark.
Power ranges explained
- Low wattage: Suitable for plastics, light marking, and applications requiring fine detail.
- Medium wattage: Common for most metal marking and moderate depth engraving.
- High wattage: Used for deep engraving, cutting, and high-speed applications.
Wattage range and marking speed determine:
- Marking Speed
Higher wattage means the machine can work faster because the power of energy being delivered is higher: so, a high wattage = faster speed. - Depth of Mark
High wattage delivers deeper marks because more energy is produced. Low wattage is better for shallow engravings and delicate materials. - Mark Contrast
While high wattage can create a darker mark, it can also produce excessive heat and cause burning or warping. - Efficiency
Laser wavelength and wattages that match the material are more effectively absorbed by the material, ensuring the most efficiency. - Precision
Lower wattage is better for fine details, while high wattage is best for larger marks.
Laser Marking Methods
Different laser techniques can yield varying results, depending on the material, depth, and specific application requirements. Here are the most common methods:


Material Considerations
It’s essential to select the correct wavelength and wattage of laser to make the best mark on your items. In addition to the material composition, there are several additional characteristics of a material that need to be factored into the selection of the correct laser. Additionally, certain techniques and settings can be used to achieve great marks. The following material attributes need to be taken into consideration:
Material Color
Color affects how much laser energy is absorbed:
- Dark materials absorb more light and heat, making them easier to mark with less power.
- Light or reflective materials can require higher power or a different wavelength to achieve the same result.
- Painted surfaces are usually not an issue since the laser often vaporizes the paint to expose the base material.
- Plastics can include additives to ensure a color change when marked, improving contrast and readability.
Surface Finish
Surface finish can influence readability and contrast:
- If the laser does not create a strong color change, a rough surface will need deeper engraving for good visibility.
- A smooth, machined surface will produce excellent results with very shallow engraving.
Thermal Conductivity
Materials with high thermal conductivity transfer heat away from the marking area, making it harder to reach the necessary temperature for marking:
- The laser parameters must be adjusted (higher power, slower speed) to compensate for this heat-sinking effect.
- Aluminum is a common example that requires special attention.
Material Hardness
Hardness has minimal impact on laser marking. A laser can mark hardened steel as easily as untreated material because the process relies on heat, not physical force.
Reflectivity
Reflective surfaces can pose challenges:
- Laser light must be absorbed to create heat.
- Highly reflective materials can bounce energy away, requiring adjustments in laser power, pulse frequency, and beam speed.
- Fiber lasers with specific wavelengths are typically used for these materials.
Lenses and Focusing
When the laser beam exits the marking head, it passes through a lens called an F-theta lens that focuses the beam to a small point suitable for marking. Important characteristics of each F-theta lens:
Focal Point
The exact spot where the beam is perfectly focused for maximum energy density.
Focal Distance (Working Distance)
The distance from the lens to the focal point. Each lens has a specific, fixed focal length that must be maintained for good quality marking.
Focal Range
A small range above and below the focal point where the beam is still focused enough for effective marking.
Marking Window
The maximum surface area the laser can mark in one cycle without moving the part. Larger marking windows require longer focal lengths.


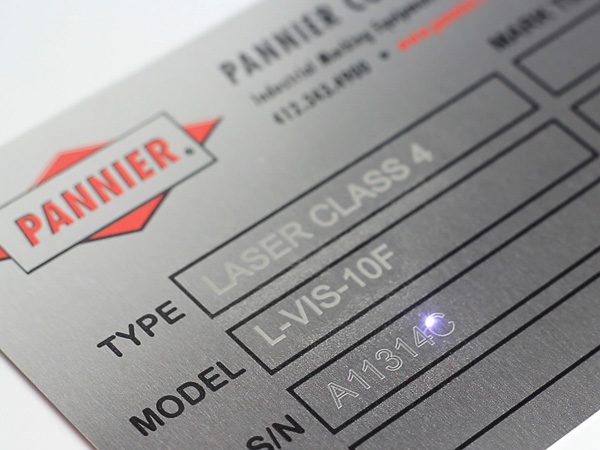
Laser Enclosures & Safety Classes
All lasers are classified according to the potential hazards they present. This ranges from Class 1, which poses the least risk, to Class 4, which represents the highest risk.
Laser Enclosures & Safety Classes
- Class 1 and 1M lasers are considered safe and incapable of causing an injury during normal operation. These lasers are either low-powered devices or high-powered beams with a fully enclosed system. Interlocks and a viewing window may be used to ensure that operators are not exposed to any beams or radiation.
- Class 2 and 2M lasers only emit a maximum of 1 milliwatt of visible light and are safe for incidental eye exposure for ¼ of a second. PPE is not required but staring into the beam could cause damage.
- Class 3R lasers produce up to 5 milliwatts of visible radiation. Eye aversion is not sufficient to prevent retinal injury, and is a significant hazard if used with microscopes or optical instruments like binoculars.
- Class 3B lasers pose a clear hazard to the eyes and skin. These lasers may have visible and invisible wavelengths present. These require controlled access and proper eye protection to operate.
- Class 4 lasers exceed 500 milliwatts of power and pose the most risk. Because of their high-power, the laser beam can cause severe and permanent eye and skin damage from direct exposure or reflections. They must be operated in a controlled area with proper signage, PPE, and oversight from a laser safety officer (LSO). These systems also are a potential fire hazard.
OSHA provides more in-depth, explicitly detailed laser safety standards and best practices.
Pannier Laser System Classes


Fume Extraction
Fumes and smoke emitted from obliterated materials and surface coatings are considered non-beam hazards and referred to as laser generated air contaminants (LGACs). Breathing in these microscopic particles is a respiratory hazard even if the material itself is not toxic. Also, these contaminants can accumulate inside the laser system which causes damage, increases the risk of a fire, and diminishes marking quality if not extracted properly. Fume extraction and ventilation systems are essential for both operator health and machine performance.